

One of the neatest ways to run Home Assistant is to pop it onto a Raspberry Pi. The tools available for this are excellent and the ecosystem is rich with documentation and addons.
I've been running my Home Assistant installation from a Raspberry Pi 4 with a 128GB SD Card for about 8 months but it appears the SD card is slowly failing - write & read speeds have degraded to such a point that the system barely can function any longer. It's a known fact that SD cards are not happy when you have lots of constant IO so it's not hugely surprising the card in mine is showing signs of wear.
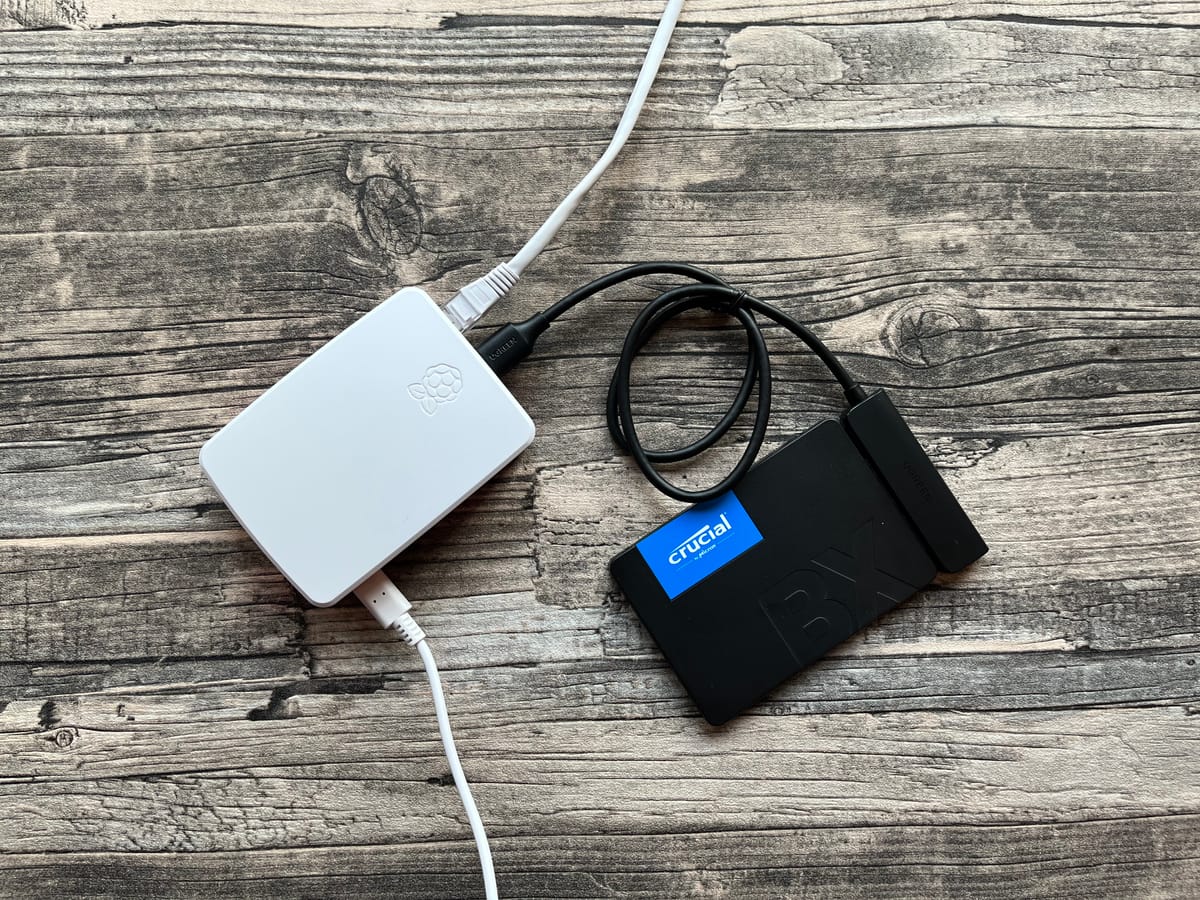
I could pop another SD card in a probably survive another 4-5 months (IO has increased rapidly as I've been adding more device) but it's not a long term solution. To fix this for longer, I've opted to use an SSD drive from Crucial which should be able to cope with the strains of my Home Assistant installation. In this guide, I'm going to go through the process of quickly switching from SD card to SSD.
Getting the components
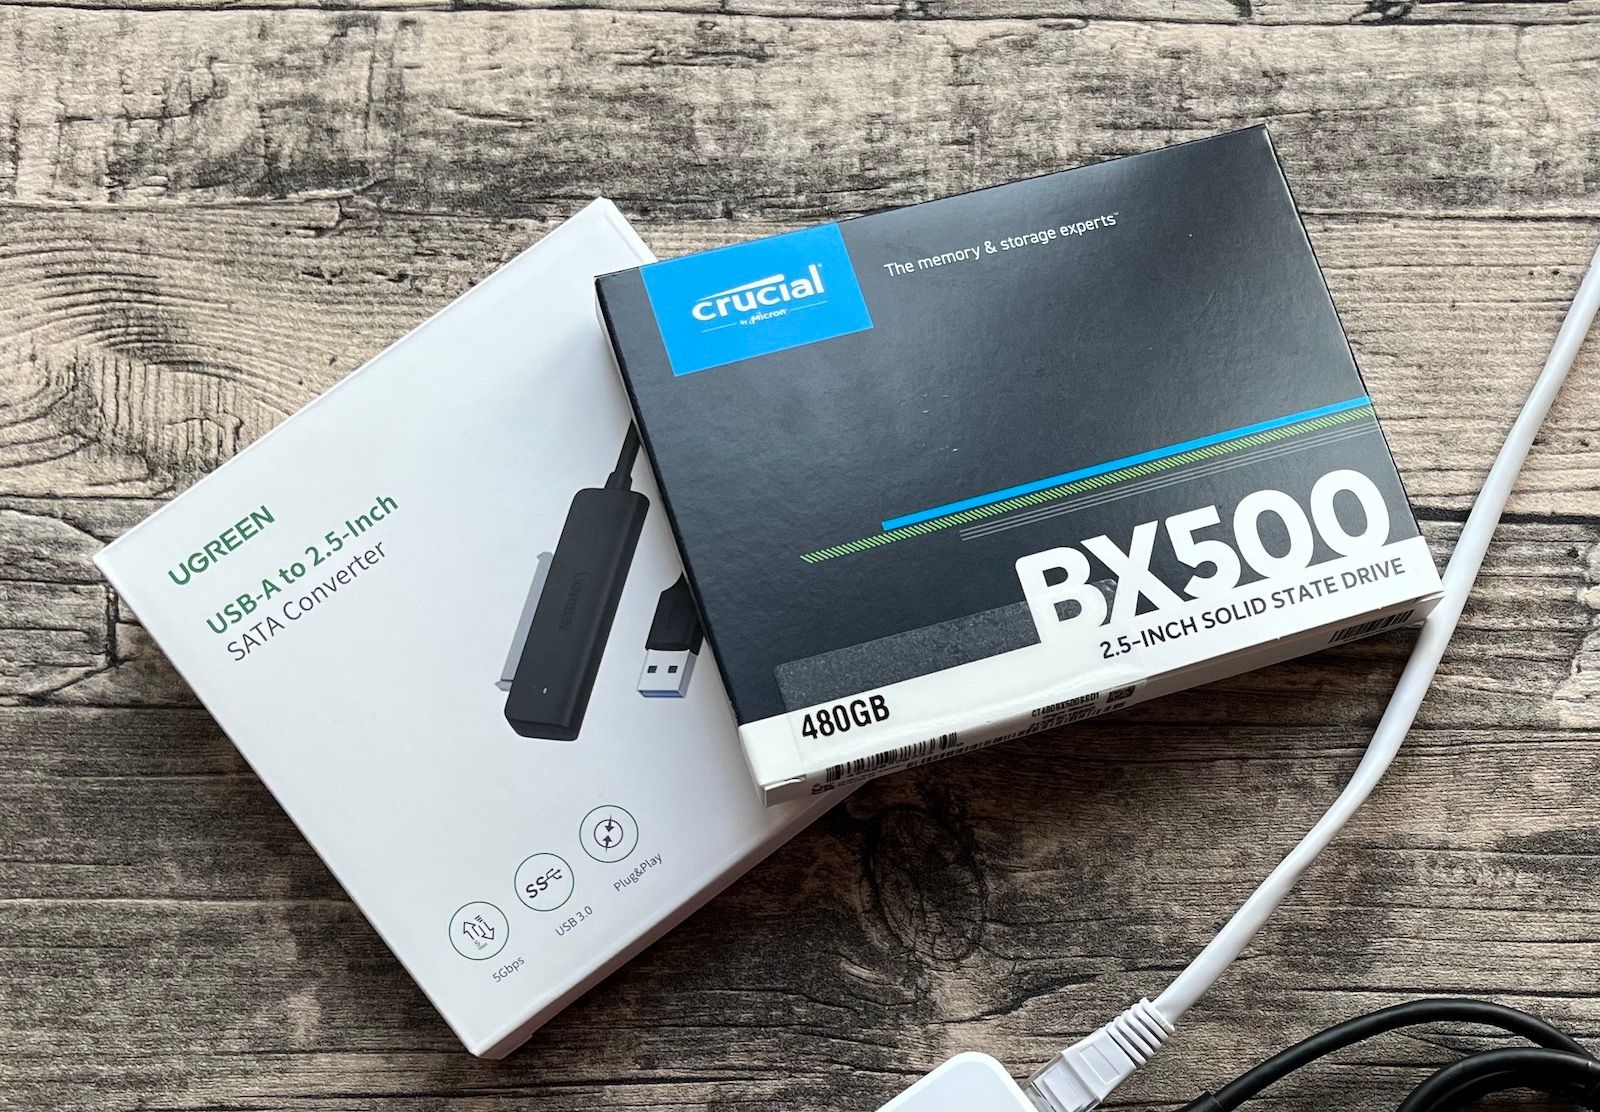
The first thing you'll need is an 2.5 inch SSD. There are lots to choose from with a range of sizes - choose one that suits your need.
The other component you'll need is a USB A to SATA adapter. This is a little more tricky because you'll need something that will actually work with the Raspberry Pi. You can refer to this list or just try and get hold of the one I have which works fine.
You will also need a spare SD card - the brand and capcaity doesn't matter. You'll use it briefly for a few minutes and it won't be needed again.
Here's what I'm using:
Taking a backup
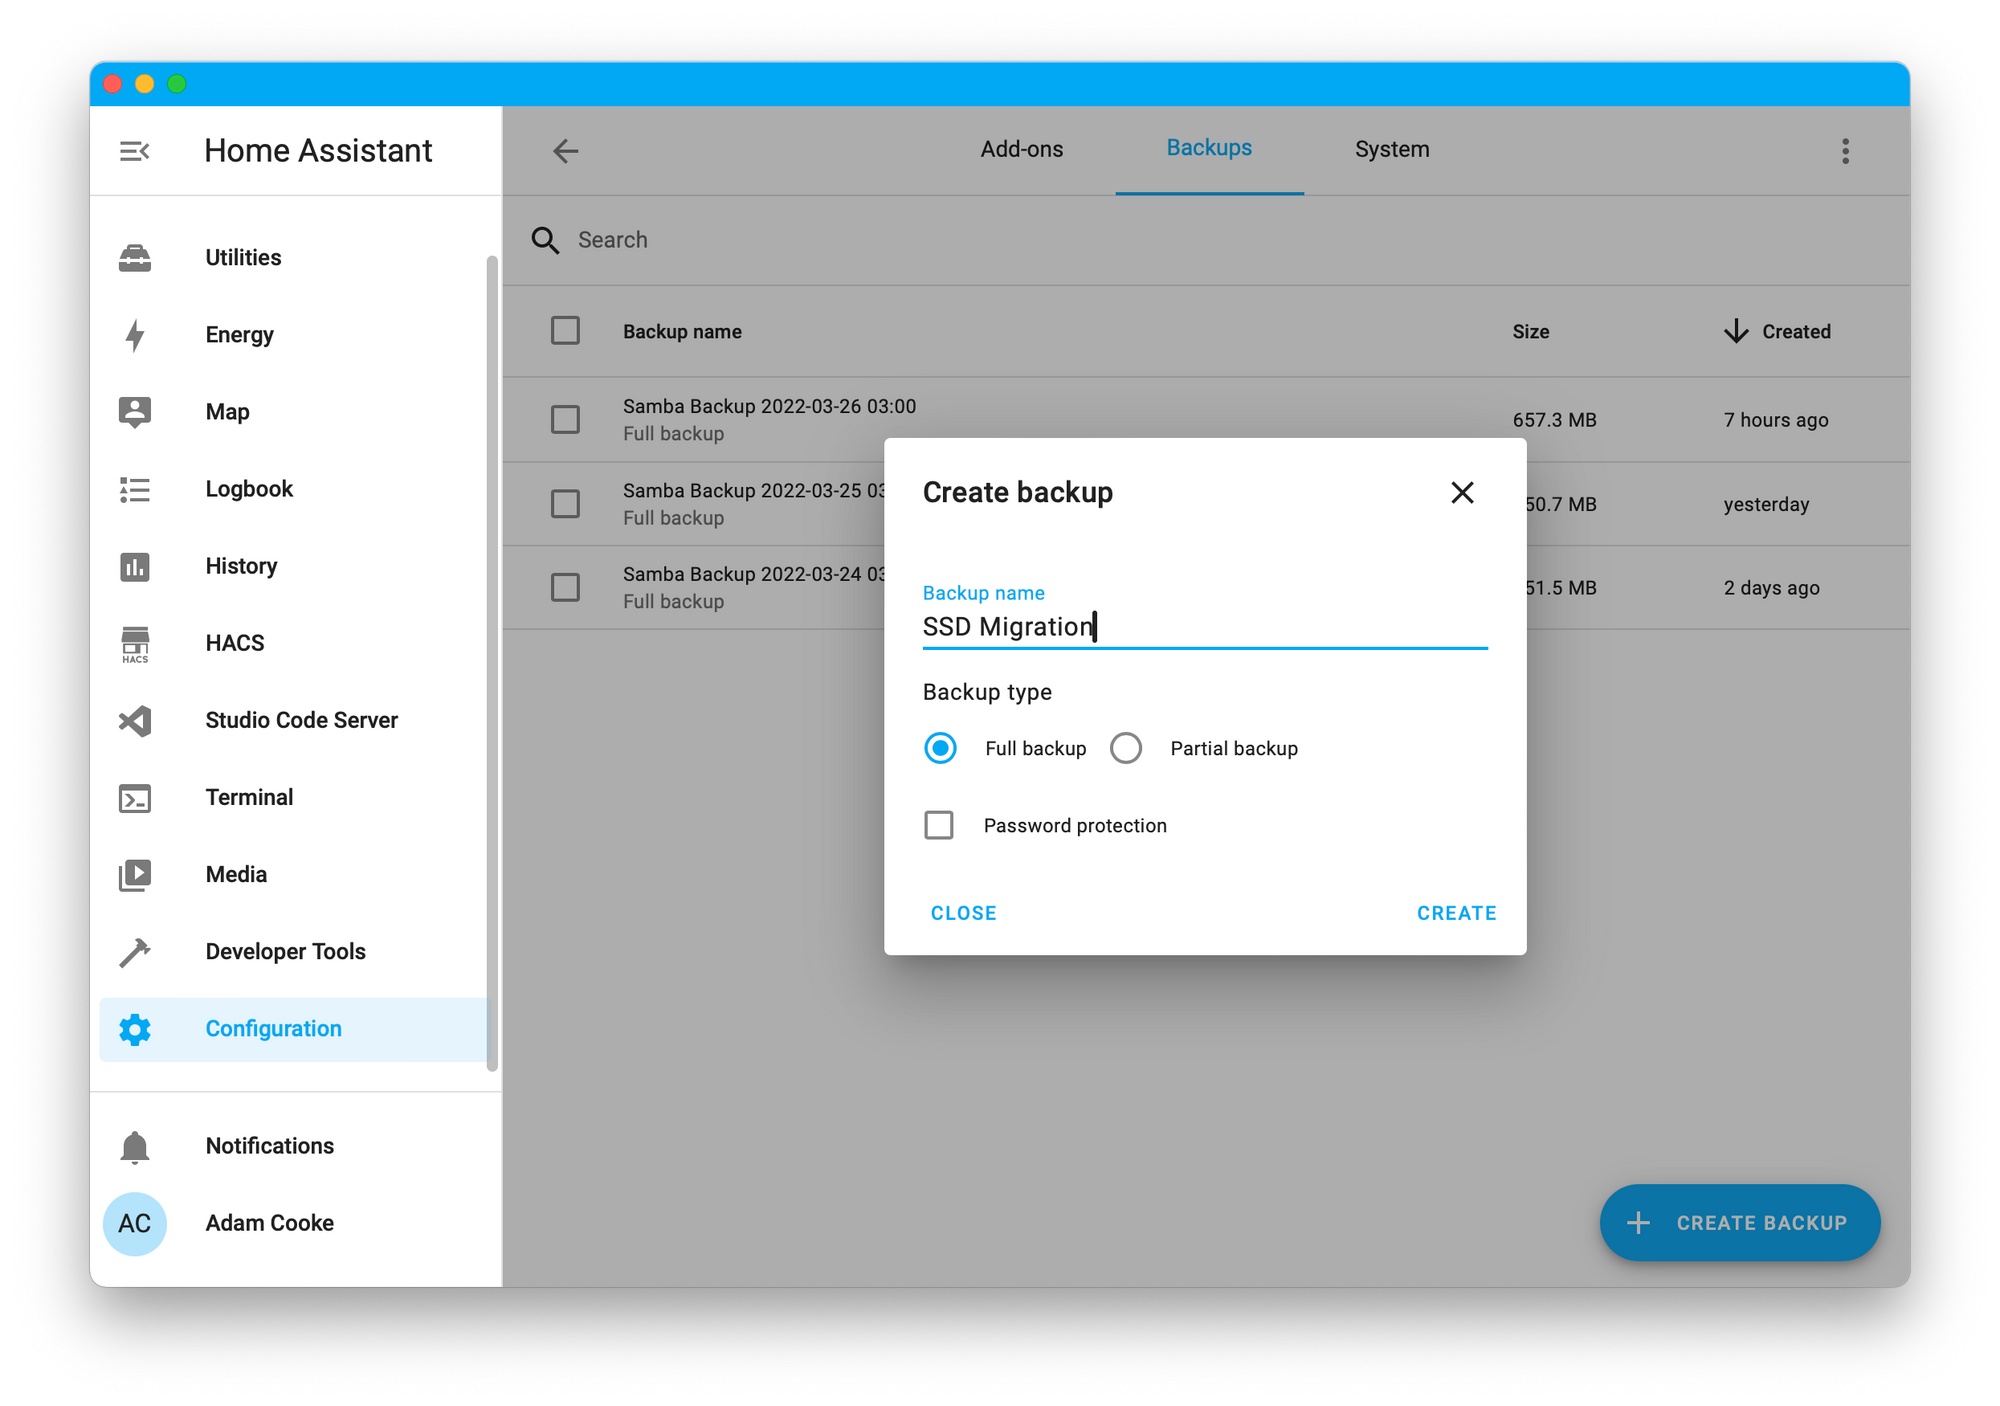
You should be taking regular backups of your Home Assistant installation - if you're not, the first thing you should do is set up something to backup every day to an external source. I just Samba Backup to backup at 3am to my Synology.
Anyway, you can take a one off backup from within your Home Assistant dashboard if you installed it using the Raspberry Pi images provided.
- Login and navigate to Configuration
- Choose Addons, Backups & Supervisor and choose Backups from the top navigation.
- Choose Create backup from the bottom right of the screen.
- Enter a name for your backup and ensure you do a Full backup
- Once the backup has completed, Download the backup to your local computer (click the backup from the list, use the three dots in the bottom right of the dialog and select Download).
Preparing your Raspberry Pi
Some Raspberry Pis will not boot from USB devices by default, so you'll need to configure it to do so.
- Insert your temporary SD card (not the one you curently use unless you're confident about your backups and on't
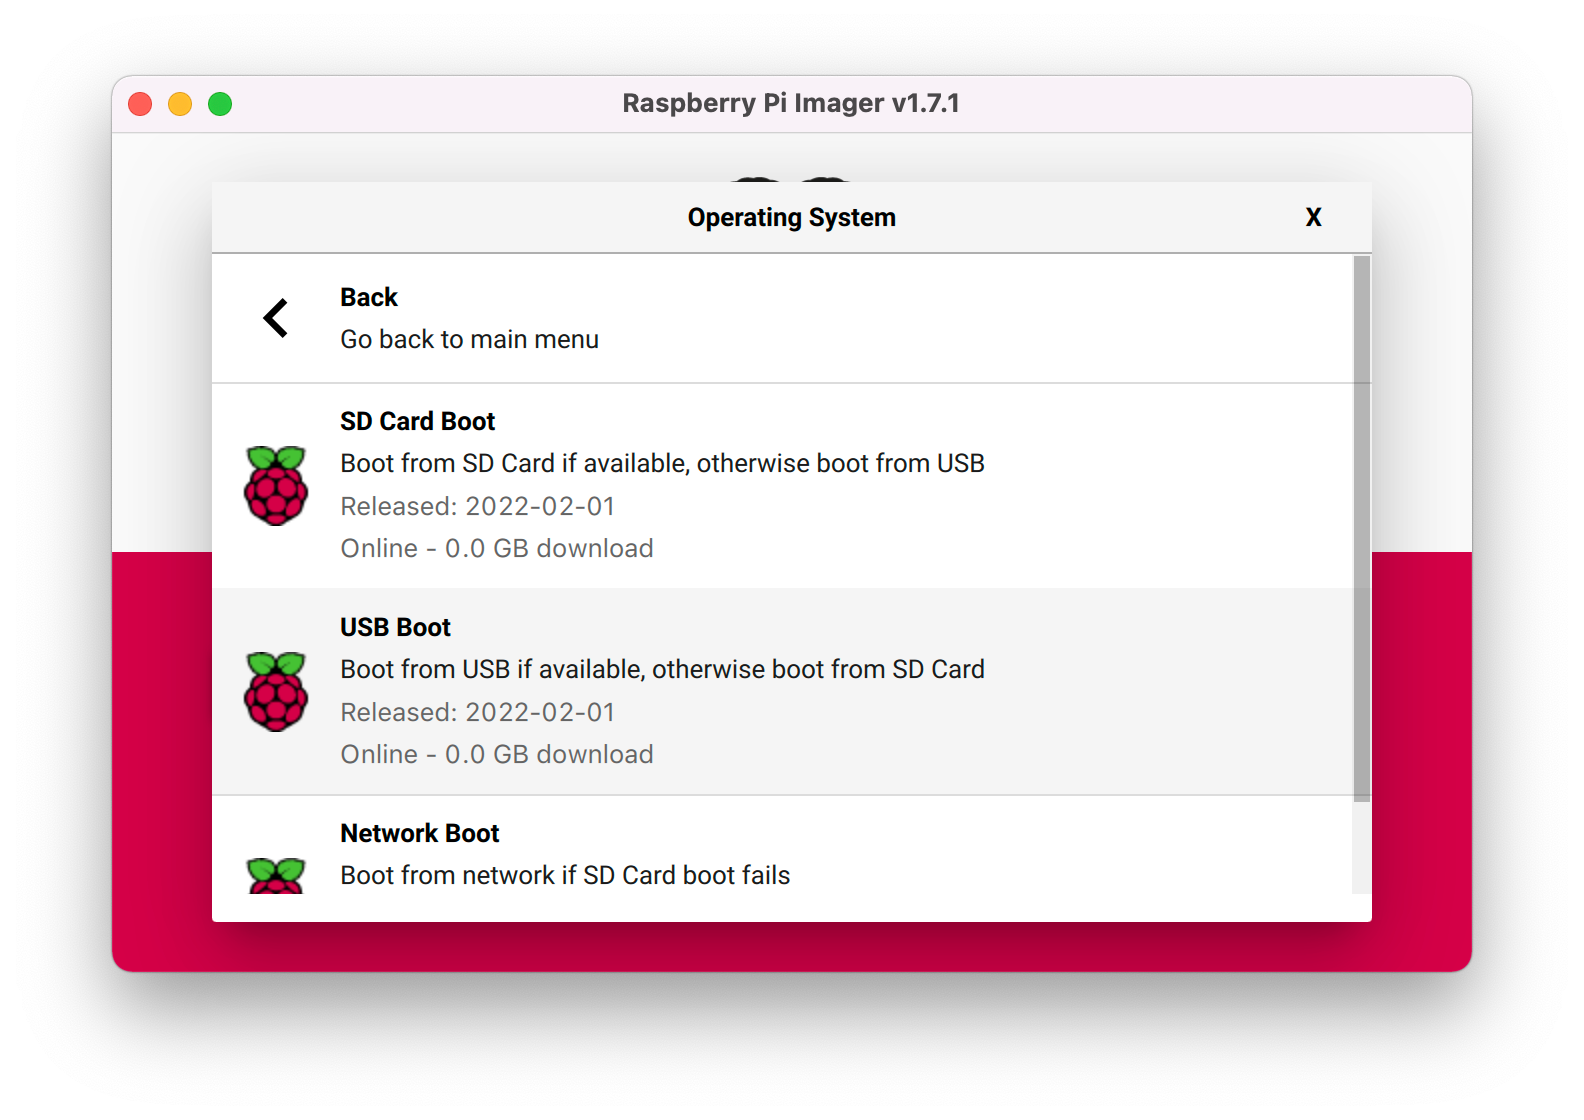
- Download the Raspberry Pi Imager utility and run it.
- Select Choose OS, then find Misc utility images, then Bootloader and then USB Boot.
- Select Choose Storage and find your SD card.
- Press Write to copy the bootloader on to your SD card.
- Once written, power down your Raspberry PI, remove any existing SD cards, put the new SD card into your Raspberry Pi and power it up.
- Wait about 30 seconds and then you can power it down and remove the SD card. You no longer need this card and can use it for something else.
Installing Home Assistant
You now need to install Home Assistant on to your new SSD.
- Connect your new SSD to your computer using your USB/SATA adapter.
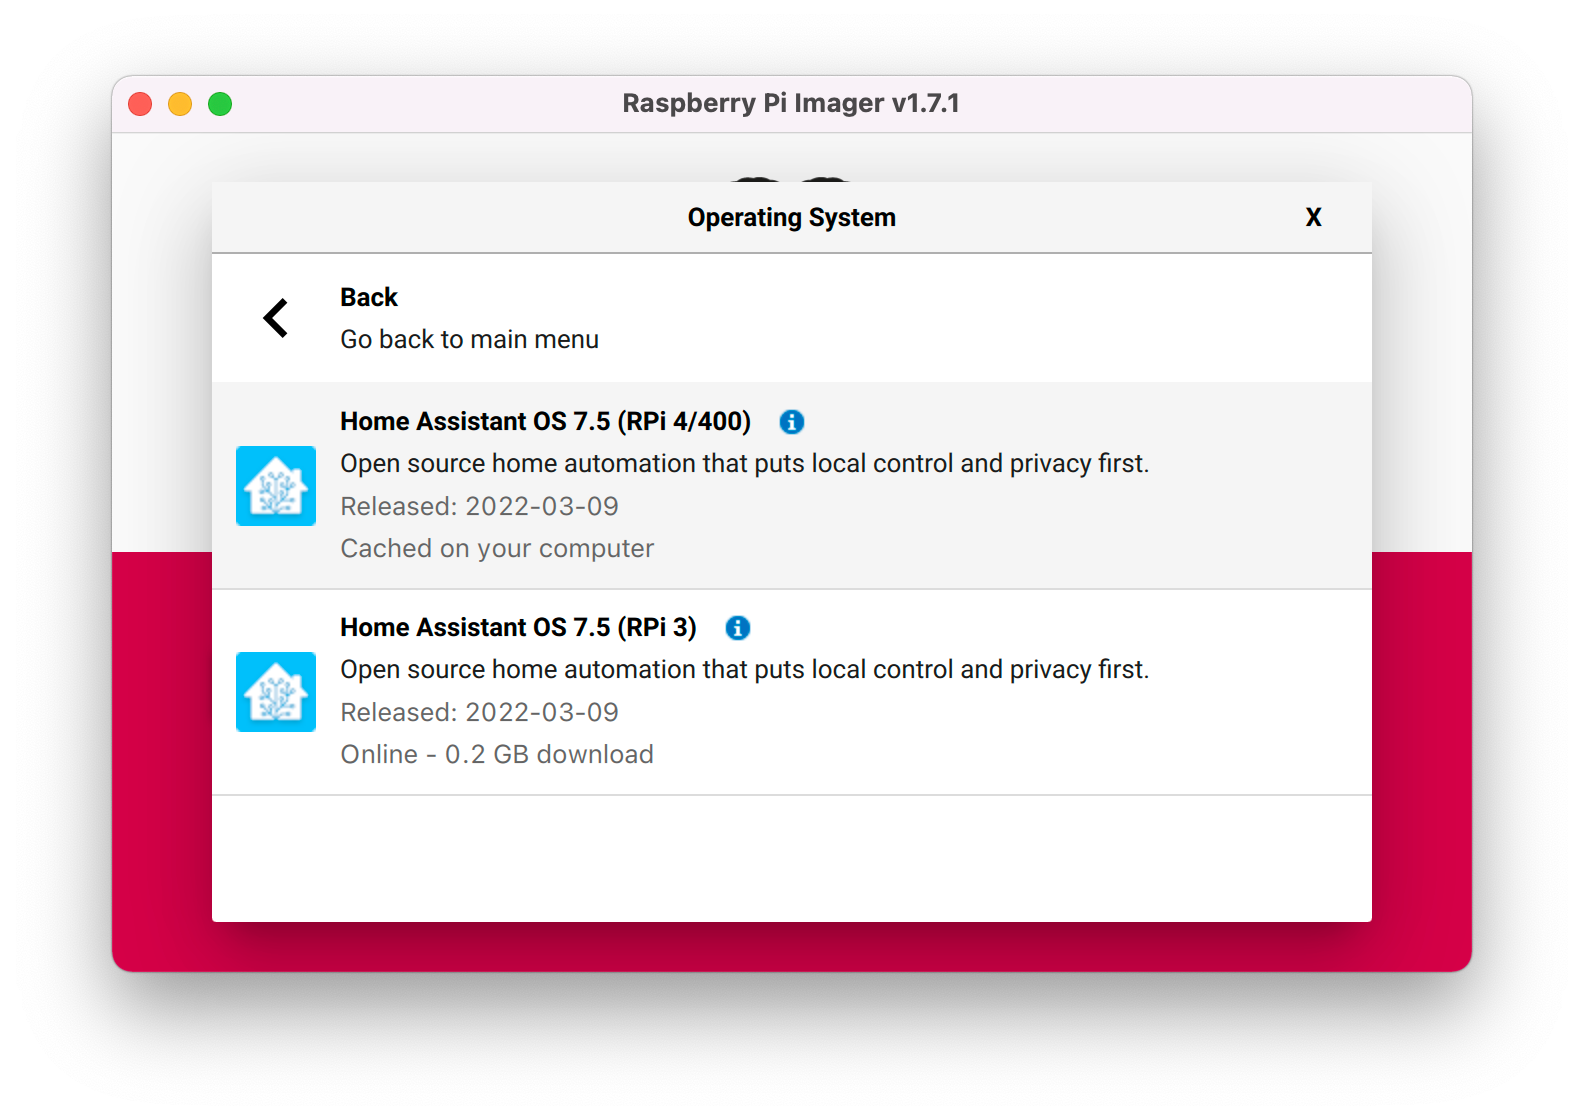
- Using Raspberry Pi Imager again you can write the Home Assistant image to the disk.
- Select Choose OS, then Other specific-purpose OS, then Home assistants and home automation, then Home Assitant and then choose the RPi4/400 version.
- Select Choose Storage and select your SSD.
- Then select Write.
Restoring your backup
You're now ready to boot up your new Home Assistant.
- Remove all SD cards from Raspberry Pi.
- Connect your new USB SSD to one of the blue USB ports on your Raspberry Pi.
- Power up your Raspberry Pi.
- Wait for a little while and then connect to Home Assistant using your web browser. From this page, rather than creating a new user, you can simply choose the option to restore your backup.
- When the restore is complete, you'll be good to go.
Some other recent posts
My development environment
In this video I'm taking a quick look at my development environment. Looking at code editor, terminal, databases, containers, web servers and more.
A quick intro to service classes
To get things started, in this video I'm looking at how service classes are used in the application. Service classes form the basis for much of the logic within this app so it's a good place to start
I'm building an app hosting platform
I'm building a app hosting platform and in this video I'm going to introduce you to the project and show you what I've got so far.