
Installing a smart doorbell
I've been researching smart doorbells for the last few weeks - here's what I came up with. Join me while I install the Netatmo Smart Video doorbell.

Written by Adam Cooke
I've been keen to install a smart doorbell for years but never been able to do so. Mainly, the people who built our house bodged the doorbell onto the door frame leaving absolutely no space for anything other than the most basic push button you can get. But secondly, I never quite found anything that I liked the idea of installing.
Things have changed a little now. We've just moved and our new house has a doorbell in a far more acceptable position and is ripe for replacement so my hunt for a doorbell began again a few weeks ago. I did some research in to the various options and this is what I discovered:
- Ring Doorbells: this is one the cheapest options available with a large range of different bells to choose from. They all seem to require Ring Protect which is a subscription service to store recordings. No native HomeKit support and seemingly quite integrated with the Amazon smart ecosystem. In my opinion, some of the least attractive units available. Many are battery powered and some do seem to support continuous charging from an 8-24V (AC) power supply.
- Nest Hello: I'd already been using Nest for a while for our smoke detectors and heating so this was quite high on my list to explore. As a Google service, this one is tightly integrated with the Google Home/Nest ecosystem. No native HomeKit. This is another that requires a subscription to Nest Aware and all videos are stored in the cloud. This requires a 12-24V (AC) power supply.
- Eufy Video Doorbell: This was never really much of a contender because I bought their eufyCam 2 product last year and was disappointed with pretty much all aspects of it - most of all, the battery life was not even close to their 356-day per charge claims. However, do have a doorbell which, unlike the others, actually comes with plug-in chime which means you don't have to use your existing chime at all which may well be an advance to some (in fact, it would have been to me as you'll see later). Eufy do keep all their recordings locally on a memory card within the doorbell itself so no subscriptions and no cloud storage on this one. Power wise, there is a battery and wired option for this - for the wired one, you'll need a 16-24 V (AC) power supply. No HomeKit on this - Eufy did spend most of last year promising it but have recently said that it won't be coming after all. Top tip here, dont trust anyone who promises HomeKit as a future software update.
- Unifi Project G4 Doorbell: I love Unifi and already have Unifi Protect cameras up and recording locally to our UDM Pro. This is a nice looking unit with local recording and no subscription. However, it is not actually available in the UK at the moment. It also does not have any HomeKit support. This one requires a 16-24V (AC) power supply and there are no battery options.
- Netatmo Smart Video Doorbell: Finally, the Netatmo product is one of the more expensive but has HomeKit support, does have local recordings (as well as a rather fancy upload to any FTP server) and is (sortof) available. Netatmo's own store is currently unavailable in the UK because they're still working out how to sell into the UK from the EU post-Brexit but Apple stock the doorbell so easy to get hold of. Netatmo's unit has the most flexible power requirements - 8-24V or 230V (AC) power is supported.
Here's a quick summary of the key things that I was looking for:
| Ring | Nest | Eufy | Unifi | Netatmo | |
|---|---|---|---|---|---|
| Cloud/Subscription | Yes | Yes | No | No | No |
| Native HomeKit | No | No | No | No | Yes |
| Power Supply (VAC) | 8-24 | 12-24 | 16-24 | 16-24 | 8-24 or 230 |
| Available | Yes | Yes | Yes | No | Yes |
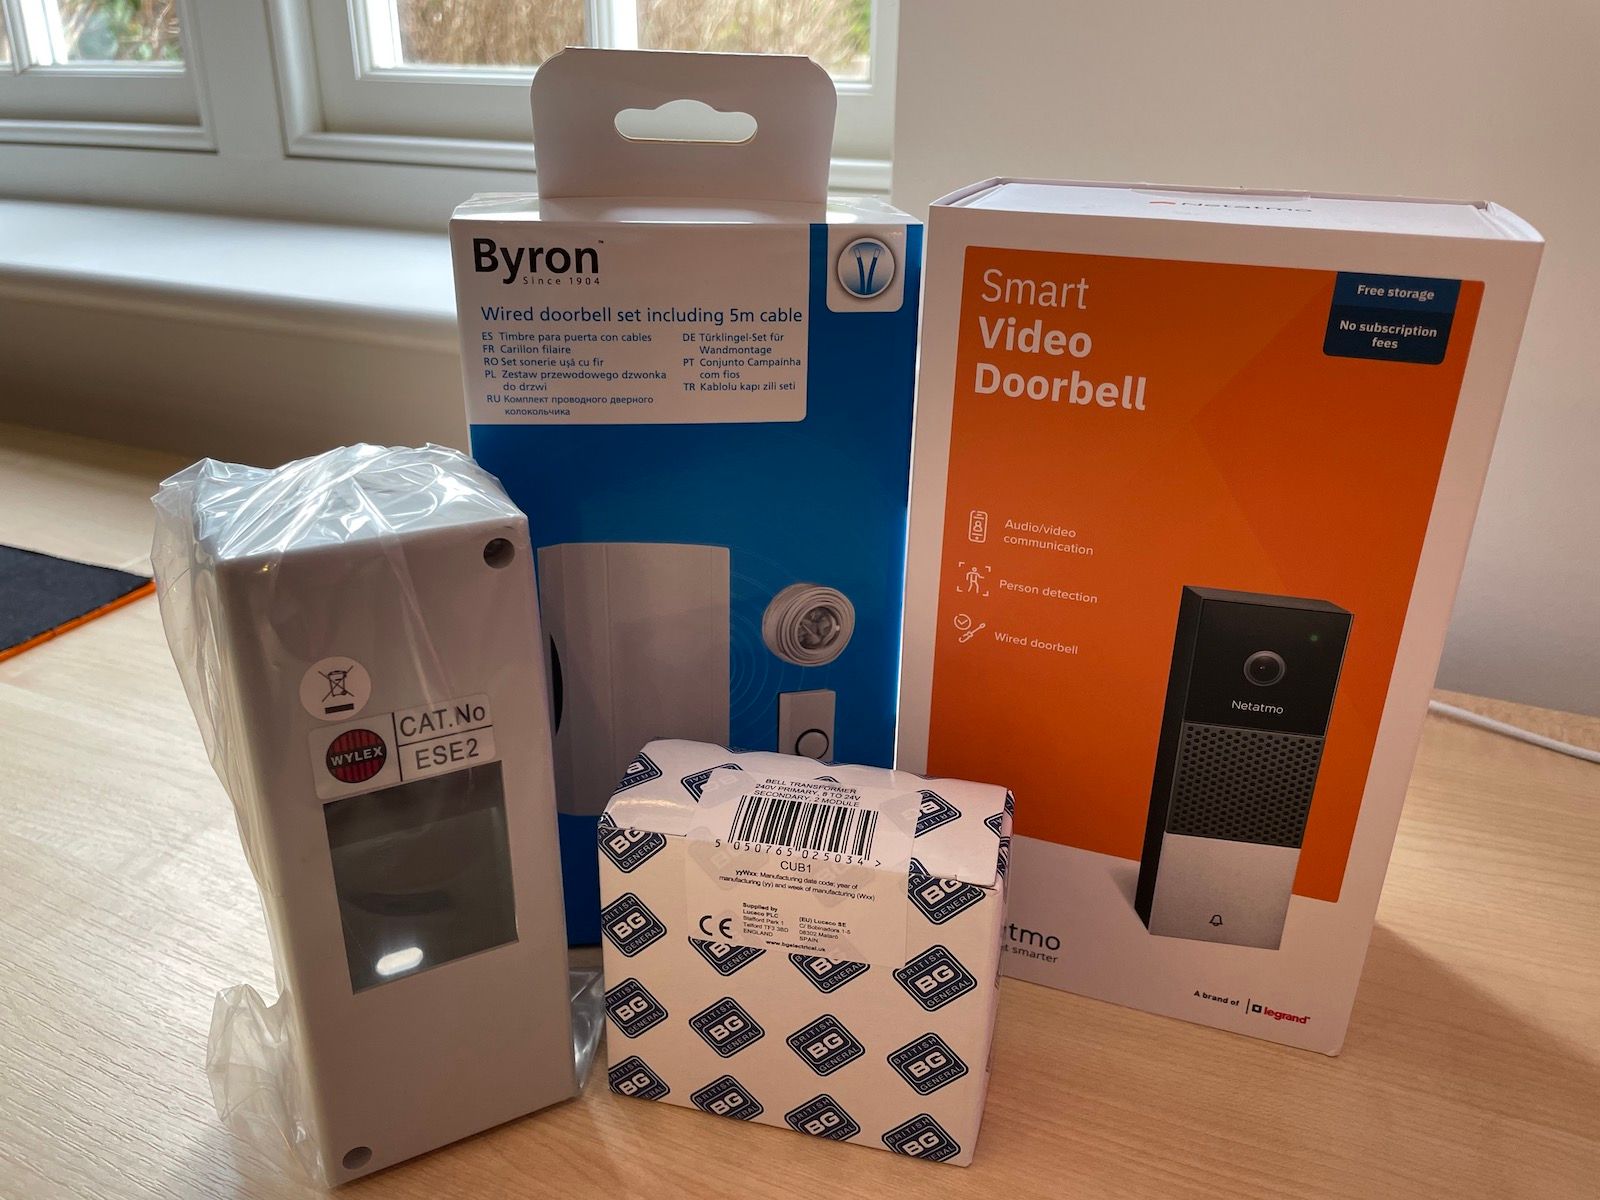
Having spent a few weeks researching and watching a few videos, I settled on the Netatmo. However, in addition to the actual doorbell, I needed a few other bits. Firstly, the "chime" we inherited with the house was just a horrible little thing that basically loudly buzzed whenever someone pressed the doorbell so that had to go. As a replacement, I just bought a cheap "ding-dong" chime from Screwfix (along with some bell wire and a push that I'll never need but this was all they had in stock). Additionally, the bell transformer was making an awful buzzing noise in our services cupboard so that also needed replacement too. Fortunately, components for a doorbell are pretty cheap (compared to the doorbell itself) and easily obtained.
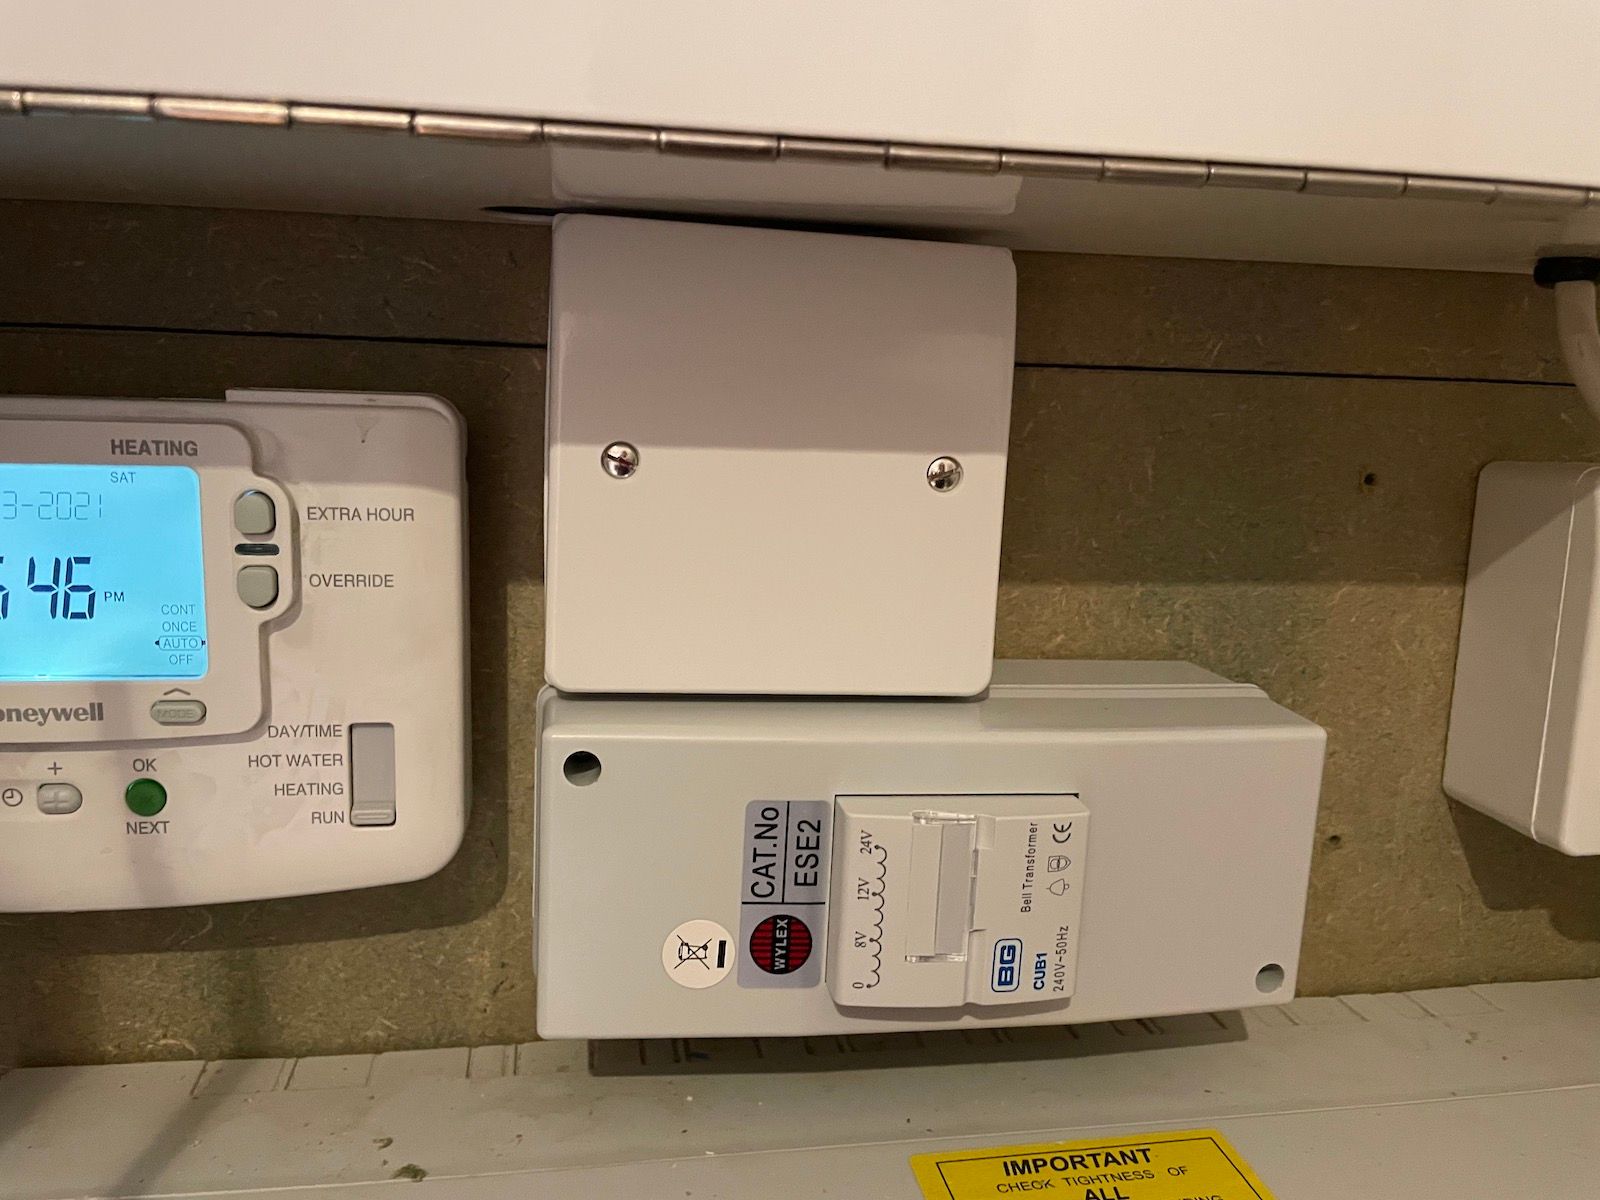
Once I got all the bits I needed together, it was time to set about installing the doorbell. The first job was to isolate the power and rip out the old transformer. This was pretty simple although I did have to mount it sideways and add a small box above it to house some electrical connections to extend the length of the existing 230V incoming power to the old transformer. I must remember to label the box!
A quick note about wiring, in many installations you'll find that "bell wire" has been used however, in my case, the builders have simply used 4 cores (doubled up) of CAT5e network cable. This stuff can be pretty brittle and that just made things harder than they needed to be. Fortunately, I have a bunch of bootlace ferrules and a crimp tool which means nothing is as messy as it was when I started.
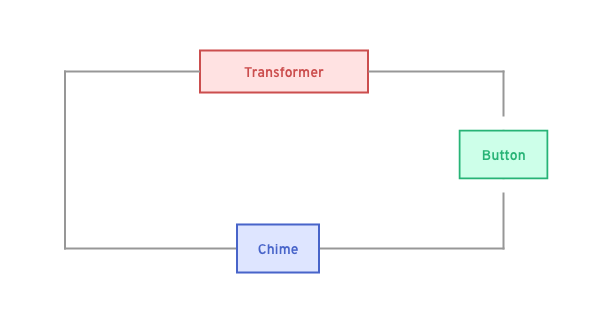
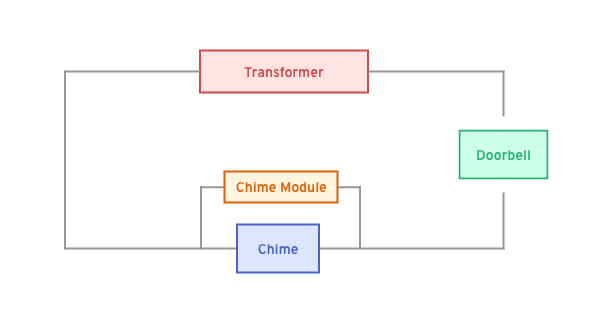
Once the transformer is in, it's time to replace the chime itself. Again, pretty simple. A doorbell is one of the most basic electrical circuits you can have. You have power, a switch and a chime that makes noise when the circuit is complete and pressing the switch completes the circuit.
The Netatmo unit is quite rare in that it is supports a huge range of different voltages out of the box. 8V, 12V, 24V or even 230V are all fine by it. In the UK, doorbells are usually set up to use an 8V transformer so if you want a hard wired solution from Google/Nest (for example), you will need to upgrade your transformer too.
Netatmo also provide, what they call, a "chime module". This is a small black box that sits in parallel with the chime. It's basically a box of magic. If you want to see more about how it actually works, efixx have a great video about it.
I was quite careful with my selection of chime because I wanted to make sure that the chime module could be left inside the chime box itself because it's pretty unslightly if you have to stick it on to the wall next to it. The Byron unit here has both battery and wired support so the chime module sits nicely in the battery compartment.
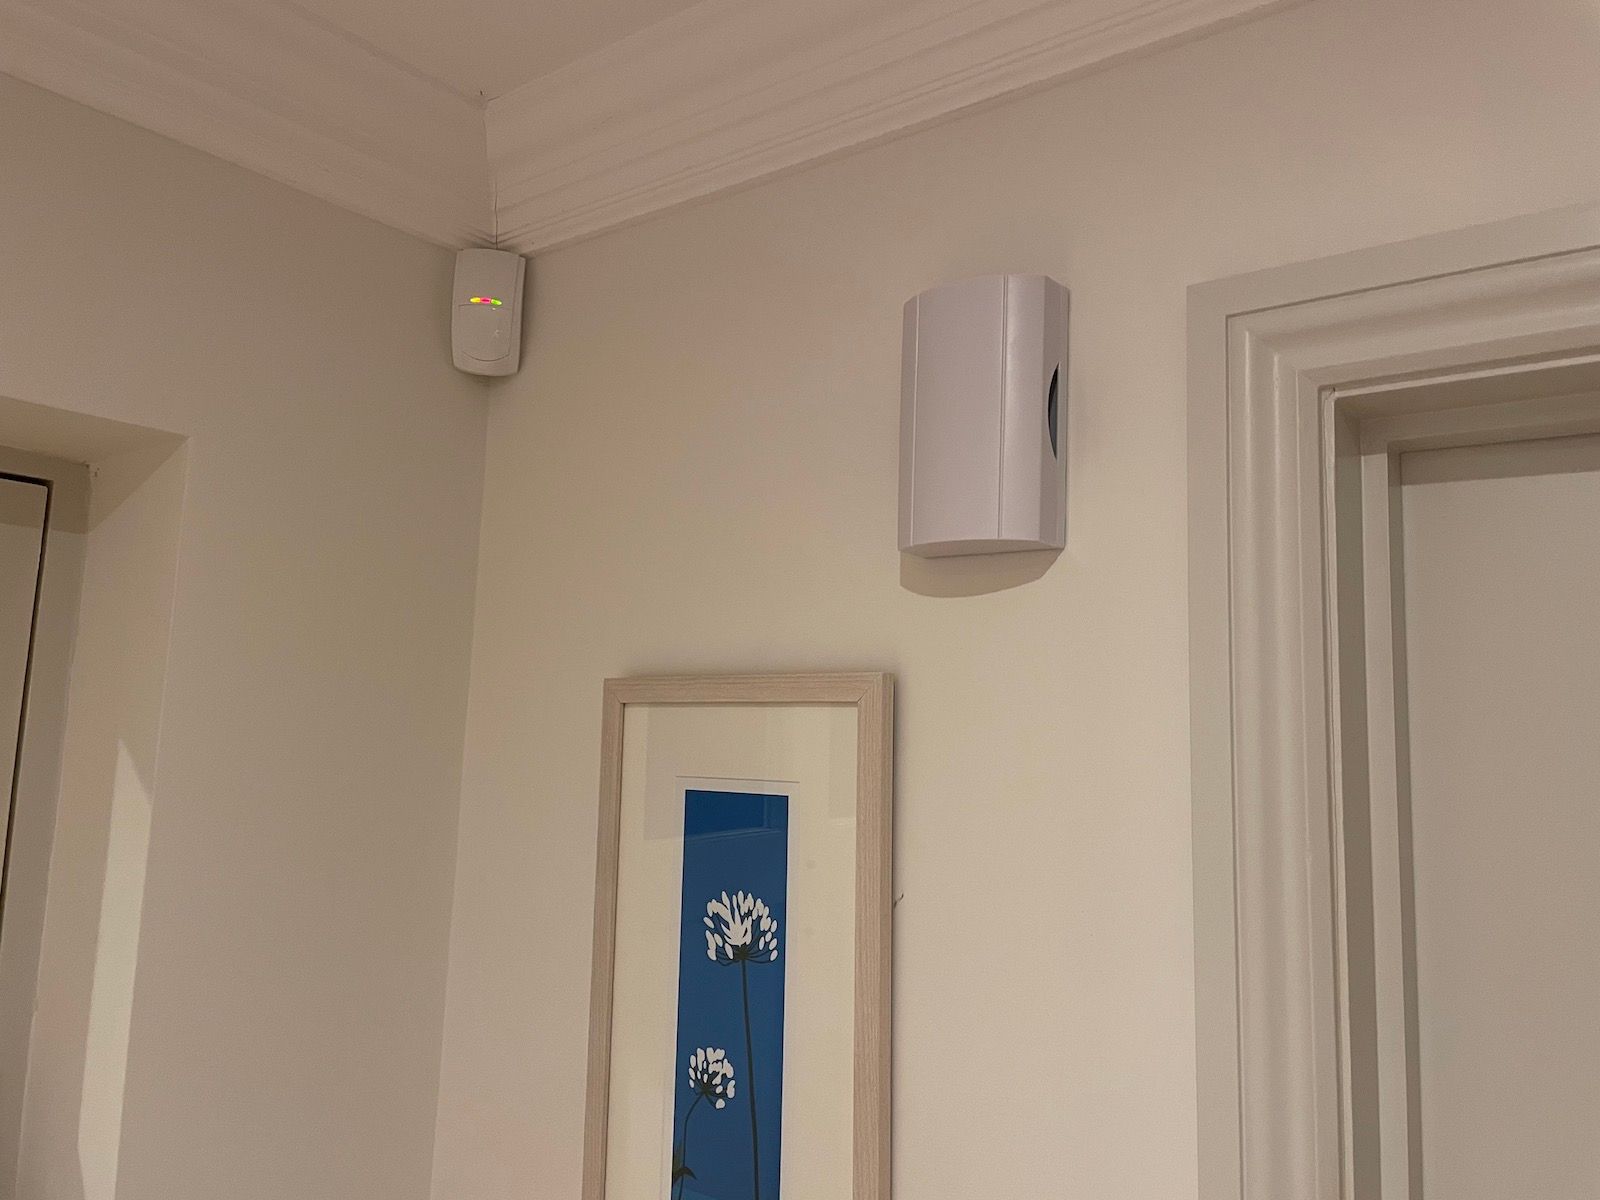
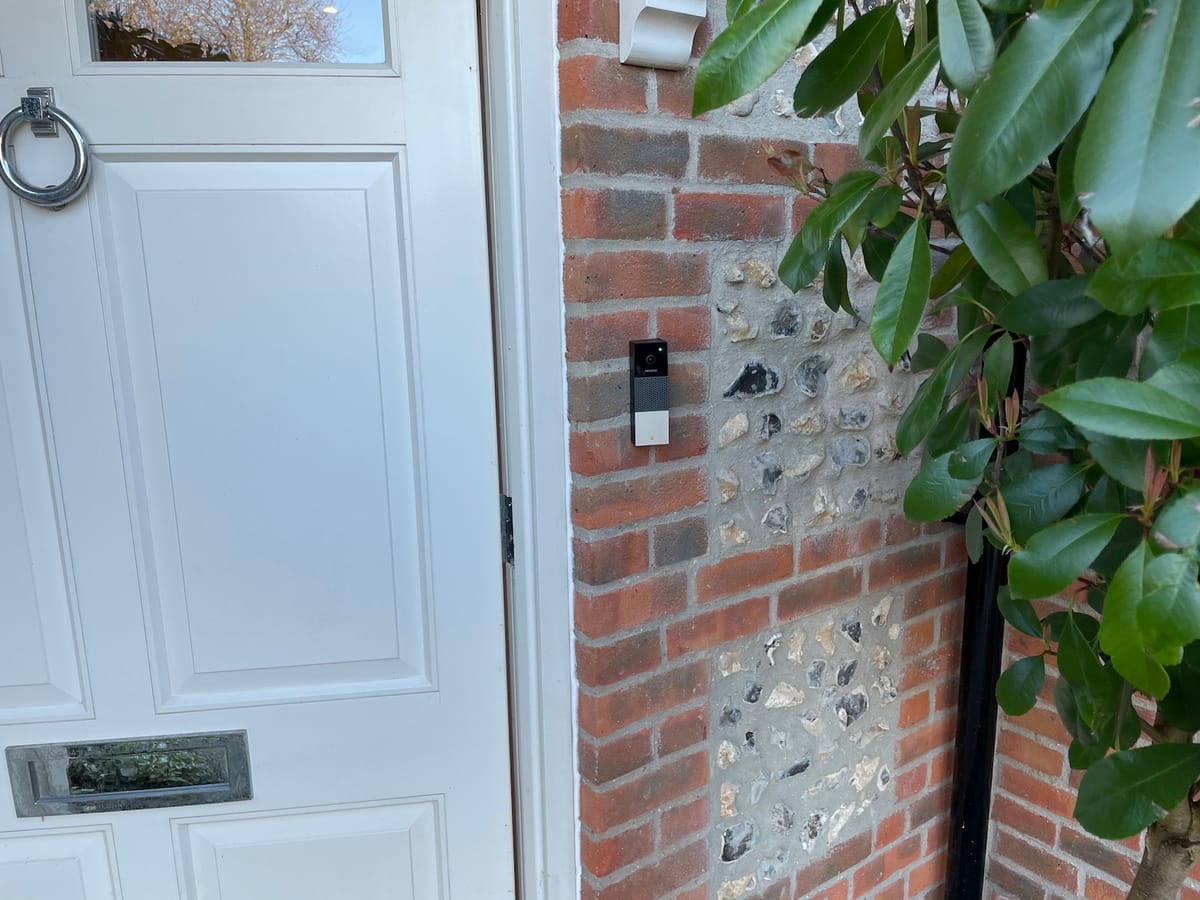
Now you've got your chime and your transformer, the last step is just to get on and install the doorbell itself. Netatmo's instructions are pretty good and step you through the process one bit at a time. I won't bore you with all the details but you drill some holes, screw a mounting bracket to the wall, pass the cables through and then put the doorbell onto the mounting bracket.
The last step in the instructions is to use the security screw into the bottom of the doorbell to make sure it can't be trivally removed. Now, be REALLY REALLY careful with this security screw. I can't stress this enough. Do not, under any circumstance, drop it into a pile of leaves that happens to be below where the doorbell is being installed. That would be a really bad idea and you'll probably have to spend half an hour, on your hands and knees, with a head torch, picking through leaves, snails and soil).
Anyway, I'd suggest skipping this screw step until you've actually got the device set up in the app. I had to factory reset mine twice during the installation - firstly because it claimed to have a problem with the power supply and you have to reset the whole unit to clear that and secondly after doing this, it refused to communicate with HomeKit. Fortunately, on the third reset it was fine.
I've had the doorbell in place for a few days now and these are my observations from it in the wild.
- The actual bell push on the doorbell unit itself is not immediately obvious as a button. As a rough guess, 30% of the people who have come to the door (entirely delivery drives and postmen) have looked a bit confused and then knocked on the door.
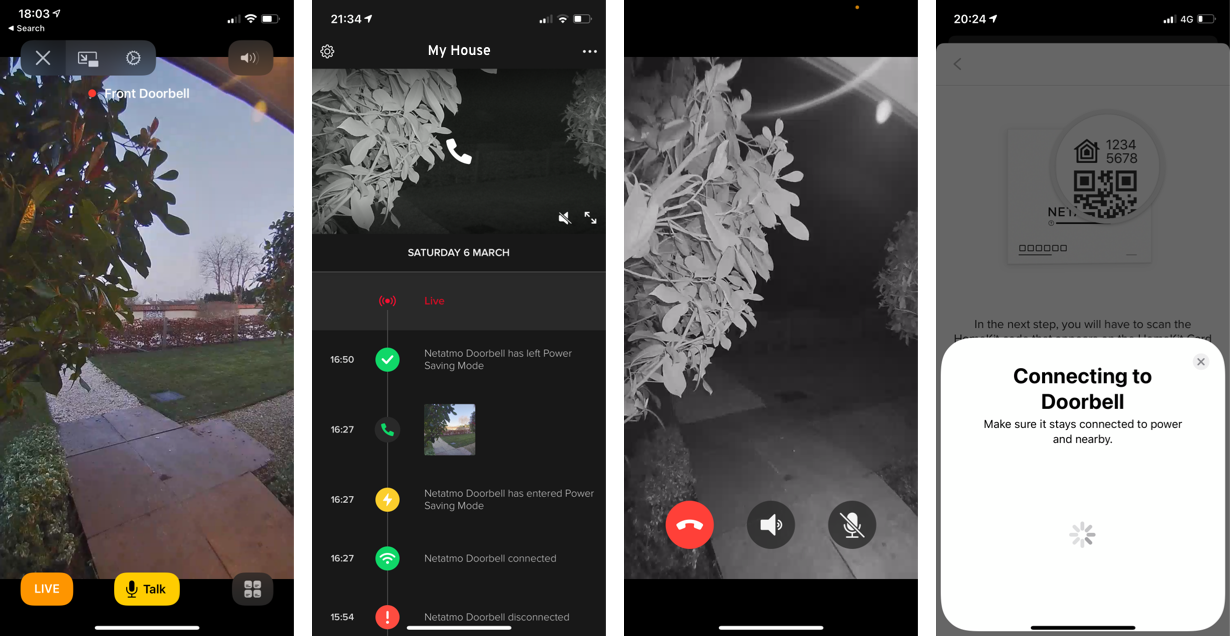
- When someone does figure out how to press the button, the app will spam you with push notifications telling you there is someone at the door every couple of seconds. If you're home, you probably don't need this and it's pretty annoying. Bell rings, you go to the door because you're in, and your phone will constantly nag you that someone is at the door despite the fact you know full well there's someone there and you've already opened the door!
- Camera image quality is alright - it's not brilliant, it's not terrible either.
- HomeKit is responsive and works well (once you manage to get it set up). There is no HomeKit Secure Video support although this has been promised by Netatmo (but as I mentioned earlier, don't hold your breath). It does, however, work nicely with any HomePods you might have around and these will chime at the same time as the button is pressed (which rather removes the need for the chime at all which now only serves as confirmation for visitors that they did actually press the right button).
- The Netamo iOS application seems alright. Some of the menus don't feel as nicely designed as I think they could be but it's a significant improvement on many smart home apps out there (I'm looking at you Lightwave!)
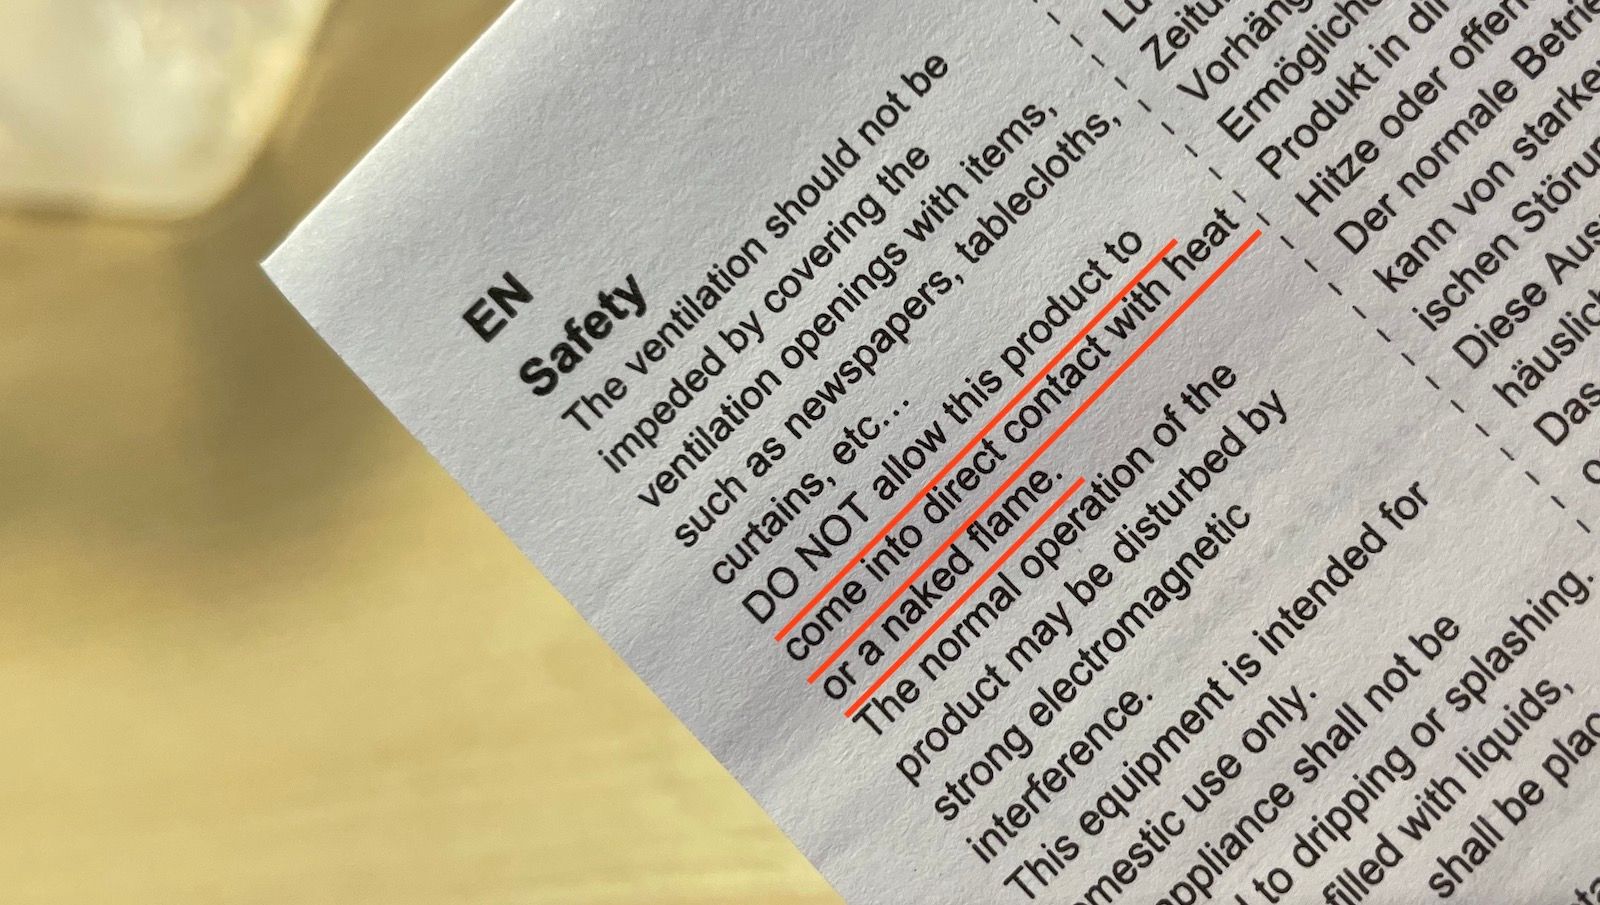
That's about it on this for now. I'll leave you with this sage piece of advice from the instructions for the chime, I suggest you apply this to 99.999% of your items.
Some other recent posts

My development environment
In this video I'm taking a quick look at my development environment. Looking at code editor, terminal, databases, containers, web servers and more.

A quick intro to service classes
To get things started, in this video I'm looking at how service classes are used in the application. Service classes form the basis for much of the logic within this app so it's a good place to start

I'm building an app hosting platform
I'm building a app hosting platform and in this video I'm going to introduce you to the project and show you what I've got so far.